Mens Hairstyles and Mustaches with Cinema 4D
 Mens Hairstyles and Mustaches
 Mens Hairstyles and Mustaches
Mens Hairstyles and Mustaches with Cinema 4D : In this tutorial, restrict hair growth to a specific part of your character’s head with a Polygon Selection Tag. You’ll also add hair guides to better direct the growth of your hair in specific regions.
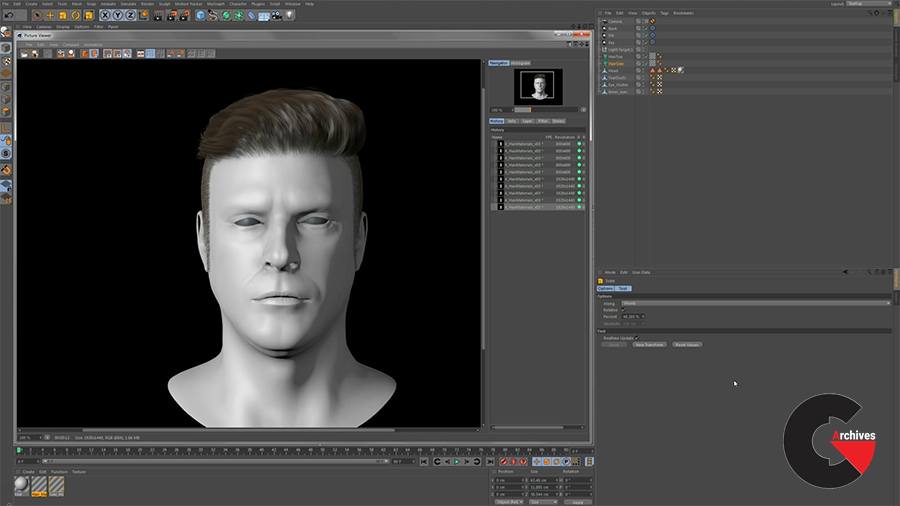
Hi. In this video we’re going to make our selection tag and add our guides. The hairstyle that we’re going to be creating today is this half-shaved, hipster look that everybody has these days. So, to start off, let’s select our object and go into face mode. Using the live selection tool let’s draw a perimeter. The reason why we use a poly selection is to improve render time. If we don’t have a poly selection it’s going to grow roots and follicles outside of the selection when it comes to calculate the hair, and yeah, your render time’s going to tank. We want to leave it loose and give it room because we also don’t want the hair growing up to the border of the polygon selection because we’re going to get these hard, sharp edges that don’t match up very well. Okay. Now that we have our selection let’s fill that. If you hit U on your keyboard, you get a list of commands. F is the one we want, fill selection. Hold shift and click and now we have our selection of where we want. Now when we come to adding hair, all your hair options are in your simulate tab, scattered throughout here. We can use Add hair, but if we do that it’s going to place it per vertice of your mesh. And since my mesh is really dense, that’s just not going to happen. So let’s undo that. And instead of adding hair, we’re going to use Add guides. Add guides allows you to place it one-by-one and you have a lot more control over the end product. So place your initial guide. And it’s important to note, the second you place that, we get a selection tag over here and we also get a hair material that’s already attached to your hair object. Let’s rename everything. So I’m okay with leaving it “hair mat, ” but having that underscore lets me know that it’s his actual hair and not just a default hair mat. Hair is fine because it’s his hair, but we want this to be named “hair selection.” Okay, now we have that, let’s start placing these guides on his head. I like to make a perimeter. So when you place your guides, let’s leave it–we don’t want it too close together–let’s leave it a little bit loose, but we still want to be able to create definition. Also, since our hairstyle has a part, let’s follow the perimeter of that part. Also, it’s important to note that we can add, remove, or replace guides at any time without consequence. Also, this character is going to be asymmetrical, so let’s just place all the guides asymmetrically. Do a quick fill and again, let’s follow this part. Okay, now we have our guides. The guides themselves look a little long though, so let’s scale these down. A quick global way to do that is if you go into your hair object under your guides tab you have a length. Let’s adjust that length. That looks better. Okay, in the next video we’re going to be shaping these guides. Thank you.(Mens Hairstyles and Mustaches)
lB6MwSwNNIYYHz66UqInBRH/video/4762
Direct download links 450 MB :

Direct download link reserved for subscribers only This VIP
Dear user to download files, please subscribe to the VIP member
- To activate your special membership site, just go to this link and register and activate your own membership . >>>register and activate<<<
- You can subscribe to this link and take advantage of the many benefits of membership.
- Direct downloads links
- No ads No waiting
- Download without any limitation ، all content in website
CGArchives Is The Best
Review
Review
Review this tutorial