3ds Max Look Development Fundamentals: Material, Texture, UV Unwrapping
 3ds Max Look Development Fundamentals
 3ds Max Look Development Fundamentals
3ds Max Look Development Fundamentals: Material, Texture, UV Unwrapping : In this online course, you’re going to learn the essential skills of “Look development” inside 3ds Max. You will learn about materials, texturing, and UV unwrapping. The curriculum is carefully crafted so you can master the skills quickly but seamlessly. Please note that this course is not designed for complete beginners. You do need some basic knowledge about 3ds Max, such as navigation, object creation, selection, and basic 3d modeling.
What you will learn
There are a total of 4 chapters in this course. In the first chapter, you will learn the basics of rendering in 3ds Max. Then learn the basics of using materials and how to manage them using the material editor. You will learn how to create a material library. Learn how to utilize the material ID and the multi sub-object material. Next, you will learn how to use the ActiveShade feature to quickly preview materials. We will also discuss several important CG concepts such as color models, bit depth, and high range images. Then you will learn different methods of adding environment lighting into the scene. From using simple colors. Then using HDRI files. And then learn to use the daylight system. After that, the curriculum focuses on material parameters. You will learn the basic settings such as the base color, metalness, and roughness. And then move on to the more advanced parameters such as the transparency, clearcoat, sub-surface scattering, emission, and so on. At the end of the first chapter, you will do a project where you add materials to a chair product and then render it.
In the second chapter, we will focus on the texturing techniques. You will learn procedural textures. Then learn how to control various aspects of the material using non-color textures. Then learn different bump effect techniques from using simple height maps, normal bump maps, and displacement effects. After that, learn to use image texture and different methods of projection UV mapping. Learn the concept of UV coordinate and the real-world size feature in 3ds Max. Next, you will learn in-depth about PBR textures. Learn the different types of PBR textures. Where to acquire PBR textures. And the strategy of how to apply PBR textures onto 3d models. You will also learn why you don’t want to rotate a normal map and how to overcome the issue if you do need to rotate it. After that, you will also learn how to use substance materials directly inside 3ds Max. At the end of the second chapter, you will do another project. You will use all the knowledge you have so far to add material and PBR textures onto a kitchen table product.
In the third chapter, we will focus on the UV unwrapping techniques. You will learn the basics of the Unwrap modifier. Learn the automatic methods of UV unwrapping. Then learn UV editing techniques from the various selection methods to using the UV transform tools. After that, you will learn how to lock, filter, hide, and freeze sub-objects in the UV editor. Next, you will learn different methods of separating and combining UV clusters such as using the “break” command, weld commands, and stitch commands. Then we move on to the quick transform features. These tools can help you speed up the UV editing process. For example, you can quickly straighten UV clusters, etcetera. After that, you will do another project creating a low poly barrel. In this project, you will learn different approaches to unwrap a 3d model. Then learn how to export the UV layout from 3ds Max to other graphic software. Learn to paint the texture and then bring the texture back to 3ds Max. After the project, you will learn different methods of UV unwrapping using the peel seams features. Then at the end of the third chapter, you will do another project creating a product packaging. The challenge of this project is to create a UV layout that follows a given print design.
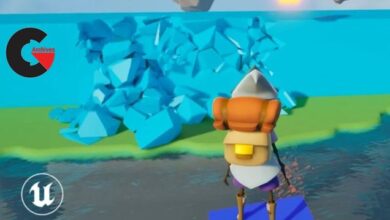
The fourth chapter is dedicated to the final project. At this stage, you will use all the knowledge you learned before in this course to create a chair product. You will start with adding the environment light. Then creating the materials through the use of PBR textures. And then UV unwrap the models. Because each part of the model is different, you will use different UV unwrapping techniques that best suit the model’s part. After that, the rendering process. Here is the result of the final project.
After completing the course, in sha Allah, you will have solid foundations on how to create materials, adding textures, and UV unwrap 3D models like this one. I hope you find this course interesting and beneficial.
lB6MwSwNNIYYHz66UqInBRH/video%205/44655
Direct download links 2.5 GB :

Direct download link reserved for subscribers only This VIP
Dear user to download files, please subscribe to the VIP member
- To activate your special membership site, just go to this link and register and activate your own membership . >>>register and activate<<<
- You can subscribe to this link and take advantage of the many benefits of membership.
- Direct downloads links
- No ads No waiting
- Download without any limitation ، all content in website
CGArchives Is The Best
Review
Review
Review this tutorial