Transforming Robot Production Pipeline Volume 1-10
 Transforming Robot Production Pipeline
 Transforming Robot Production Pipeline
Transforming Robot Production Pipeline Volume 1-10 :
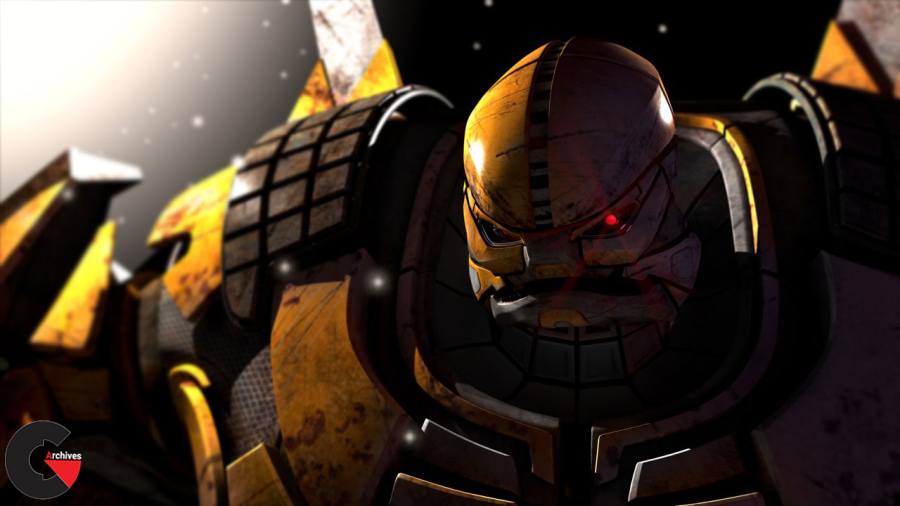
Volume 1: Concept and Design
In this tutorial, we will learn about the process of creating concept art for a transforming robot within a production pipeline. To get started, you should know that this course will focus on providing you with a high-level glimpse at my thought process in designing our robot. While we won’t focus on painting every brush stroke, I will be walking you through each step, demonstrating techniques as well as providing insight into the process. First, we’ll jump in and knock out some quick silhouette options to establish our robot’s form and pose. After spending some time roughing in possible details for our silhouette, we will begin refining forms in grayscale. We will then learn about the coloring process for this project from base color all the way through finishing details. We’ll wrap things up by learning about some final steps that are taken before handing our artwork to the next artist in the pipeline. After completing this course, you’ll not only know how the concept art was painted, but you’ll also understand the design decisions that were made leading up to our finished concept. Software required: Photoshop CS5.
Volume 2: Truck Modeling
In this Professional Series course, we will explore some the techniques and concepts involved in building and preparing the vehicle portion of our transforming robot project. This specific high-level course was designed to evolve your workflows, and give you some concepts to keep in mind as you go through the process of building the vehicle portion of your transforming robot. We’ll look at a few modeling techniques to make the model more realistic, UV layout concepts, and cutting up the model in preparation for its transformation. Before we start, we recommend you have experience using Maya as we cover a lot of information in a short span of time. We won’t be going through the modeling of this truck step by step, so if you’re an artist new to Maya or to modeling, the Beginner’s Guides and Introduction courses are perfect places to start getting up to speed. From there you can check out any of the intermediate step-by-step, project-based courses (automotive courses especially), and they will take you through the entire process and give you the tools you need to complete the model. Software required: Maya 2012.
Volume 3: Truck Texturing
In this tutorial, we will learn about the process of texturing our transforming robot’s vehicle form. To get started, you should know that this course will focus on providing you with a high level glimpse at my thought process in painting the textures for our truck asset. While we won’t focus on painting every stroke of our textures, I will be walking you through each step, demonstrating techniques as well as providing insight into the process. Throughout this course, we will reveal valuable information about this process including targeting geometry for painting on a complex model, using lights and masking to paint texture in hard to reach places, and using MARI 1.4’s layered painting unproject and project workflow to create decals for our vehicle. After completing this course, you’ll not only know how the texture maps for our truck were painted but you’ll also gain insight into the thought process behind painting them. Software required: MARI 1.4v2.
Volume 4: Robot Modeling
In this course, we will cover the steps involved in building the robot portion of our transforming robot series. This specific high-level course was designed to evolve your workflows, and give you some ideas to keep in mind as you go through the process of building the robot portion of your transforming robot. The objectives for this fast-pace course include looking at several issues to be dealt with when creating the transforming robot. We’ll look at ways to use ZBrush and TopoGun in our workflow to build the fitted pieces and panels of the robot. In addition to modeling techniques, we’ll talk about UV layout concepts, creating a proxy, and working cooperatively with other artists, including those working in other applications. It is recommended that you have some experience using Maya, ZBrush, and TopoGun, as we cover a lot of information in a shorter span of time. We won’t be going through the modeling of the robot step-by-step, so if you’re a new artist, the Beginner’s Guides and Introduction courses are perfect places to start getting up to speed. From there you can check out any of the intermediate step-by-step project based courses and they will give you the tools you need to complete the model. Software required: Maya 2012, TopoGun, ZBrush 4, 3ds Max 2012.
Volume 5: Robot Texturing
In this tutorial, we will learn about the process of texturing our transforming robot’s robot form. To get started, you should know that this MARI tutorial will focus on providing you with a high level glimpse at the thought processes that went into painting textures for our robot. While we won’t focus on painting every stroke of our textures, we will be walking through each step, demonstrating techniques as well as providing insight into the process. This also means that if you use another application for texturing, you’ll still get valuable information from this course in terms of how different texture elements will be identified and layered. This course will begin by focusing on selecting geometry and how MARI’s selection groups can make this much easier. From here, we will focus on laying down a base of photographic texture for our robot before moving into adding additional details like dirt, rust, and scratches. To wrap this course up, we will learn how to repurpose channels of data for our specular map and then export those maps out of MARI. After completing this course, you’ll not only know how the texture maps for our robot were painted but you’ll also gain insight into the thought process behind painting them. Software required: MARI 1.4v2.
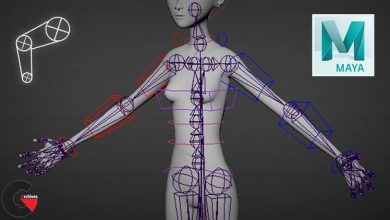
Volume 6: Rigging
In this tutorial, we will learn the methods that are used to rig a transforming robot. Throughout these lessons, we will learn the tools and techniques used in the setup process of both our robot and truck. The goal is to break this complex idea down into a simple and manageable form. We’ll cover the rigging process in its entirety, and along this journey, we’ll be introduced to several tools that will help make this all come together efficiently. By the end of the course, you’ll have the set of skills needed to rig your own transforming robot. Software required: Autodesk Maya.
Volume 7: Match Moving
In this Professional Series course, we will explore some the techniques and concepts involved in creating a 3D camera animation from footage in NUKEX and cleaning up our footage for later compositing. This specific high-level course was designed to evolve your workflows and give you an in-depth look at creating a complete match move from scratch in NUKEX. The objectives for this fast-paced, intensive course include creating a 3D camera and scene to pass off to the 3D department and creating a better piece of footage to give to the final compositors. By the end of this training, you’ll have the ability to track your own shots in NUKEX and solve many common match moving and plate cleanup problems. Before we start, we recommend you have experience using NUKE and Maya. We will be moving at a quick pace, so if you’re an artist without experience in either of these applications, we have many courses to get you started and improve your skillset. Software required: NUKEX 6.3v6, Maya 2012.
Transforming Robot Production Pipeline Volume 8: Animation
In this tutorial, we will learn about the animation process of the transforming robot. Throughout these lessons, we’ll cover the workflow used to animate the robot while breaking down each stage of the performance from beginning to end. We’ll also modify the robot’s rig with add-ons for more control. By the end of the course, you’ll have the understanding needed to animate your own transforming robot. Software required: Autodesk Maya .
Transforming Robot Production Pipeline Volume 9: Lighting and Rendering
In this Professional Series course, we will explore some the techniques and concepts used during the compositing of our transforming robot project. We will learn how to deal with issues importing our passes and how to create a missing pass. From there, we will learn the basic shuffle and compositing techniques, along with some novel uses of various passes to enhance our composite. We will color correct the foreground and background to match. To ground the vehicle, we will create particle effects in NUKEX. Finally, we will finish the shot with post effects like flares, lens reflections, lens distortion, blooms, grain, etc. In the end, we will have our completed shot in NUKE. Software required: NUKEX 6.3.
Volume 10: Compositing
In this Professional Series course, we will explore some the techniques and concepts used during the compositing of our transforming robot project. We will learn how to deal with issues importing our passes and how to create a missing pass. From there, we will learn the basic shuffle and compositing techniques, along with some novel uses of various passes to enhance our composite. We will color correct the foreground and background to match. To ground the vehicle, we will create particle effects in NUKEX. Finally, we will finish the shot with post effects like flares, lens reflections, lens distortion, blooms, grain, etc. In the end, we will have our completed shot in NUKE. Software required: NUKEX 6.3.
lB6MwSwNNIYYHz66UqInBRH/video%204/28908
Direct download links 900 MB :

Direct download link reserved for subscribers only This VIP
Dear user to download files, please subscribe to the VIP member
- To activate your special membership site, just go to this link and register and activate your own membership . >>>register and activate<<<
- You can subscribe to this link and take advantage of the many benefits of membership.
- Direct downloads links
- No ads No waiting
- Download without any limitation ، all content in website
CGArchives Is The Best
Review
Review
Review this tutorial