Creating a Photorealistic Scene with 3ds Max and V-Ray
 Creating a Photorealistic Scene
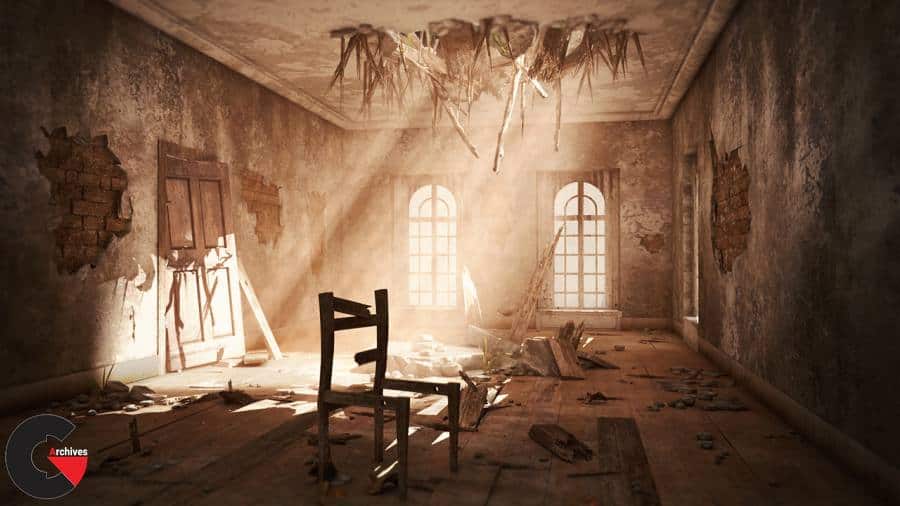
Creating a Photorealistic Scene with 3ds Max and V-Ray : Quickly developing scenes that look ultra-realistic can be difficult if you don’t have the proper tools to do it well. In this course, Creating a Photorealistic Scene with 3DS Max and V-Ray, you will learn how to create a gorgeous, photorealistic render with ease and efficiency. First, you’ll learn how to block out the concept. Second, you’ll use tools in 3ds Max to add large details. Third, you’ll discover how to add dirt and debris and finally, render multiple passes. When you’re finished with this 3ds Max course, you’ll not only be able to create gorgeous renders, but also be able to quickly use these tools to do the same with any scene you need.
Software required : 3ds Max 2014, V-Ray 3.2, and Photoshop CC.
- Author and Course Introduction
- Customizing User Interface in 3ds Max
- Looking into Reference Images and Gathering Ideas
- Blocking Out the Basic Shape
- Setting the Camera
- Creating Openings for Windows
- Creating Window Frame
- Adding Details to the Window
- Creating Floor Planks
- Creating Door
- Creating the Frame For the Door
- Creating Crack for the Ceiling
- Adding Cracks to the Walls
- Adding Base to the Windows
- Adding Border Details to Ceiling and Walls
- Creating Broken Glass for Windows
- Fixing Mesh Issues for Proper Texturing
- Creating Composite Material for Walls
- Fixing Normals of the Walls
- Texturing Windows with Composite Material
- Texturing Floor Planks
- Analyzing Material for the Roof
- Setting Up Debris Maker Plugin
- Generating Debris Elements using Debris Maker
- Adding Broken Planks to the Floor
- Adding Bricks to the Walls
- Using Scattered Object to Place Small Debris on Floor
- Adding Detailed Debris to Broken Roof and Ground
- Setting up V-Ray for Test Rendering
- Setting up Global Illumination
- Setting up V-Ray Lights
- Adding Directional Lights and Shadows to the Scene
- Fixing Mesh Issues and Adding More Lights
- Adding Details to Walls, Roof and Specular Maps to Texture
- Finalizing the Lighting Setup
- Adding Environmental Fog to the Scene
- Setting up V-Ray Passes for Final Render
- Analyzing Render Passes
- Compositing Render Passes in Photoshop
- Adding Z-Depth Pass to Achieve Depth of Field
- Comparing Different Types of Composited Images
- Conclusion
lB6MwSwNNIYYHz66UqInBRH/video/8048
Direct download links 1.5 GB :
Direct download link reserved for subscribers only This VIP
Dear user to download files, please subscribe to the VIP member
- To activate your special membership site, just go to this link and register and activate your own membership . >>>register and activate<<<
- You can subscribe to this link and take advantage of the many benefits of membership.
- Direct downloads links
- No ads No waiting
- Download without any limitation ، all content in website
CGArchives Is The Best
Review
Review
Review this tutorial
 Creating a Photorealistic Scene


