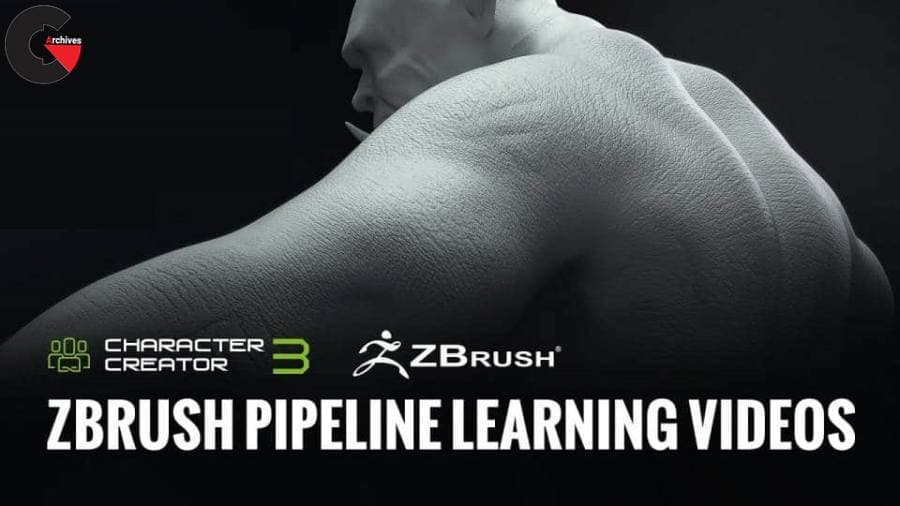
Character Creator Pipeline Training – Making a toon character
 Character Creator Pipeline Training
 Character Creator Pipeline Training
Character Creator Pipeline Training – Making a toon character : Follow the step-by-step tutorials by the industry-leading expert. Learn from the Basic CC3 GoZ Pipeline and Flexible Design Change to Advanced Design for Custom Eyes, Lashes, Teeth, and Build Head Morph. Get the Free ZBrush Character Models created in the tutorials to help you hands on practice.
Tools used in the tutorial videos:
Character Creator, iClone, 3DXchange, ZBrush, Marmoset Toolbag, Substance Painter, Photoshop, Maya
Introduction
This series shows you the process of using CC3 and ZBrush to create a custom toon style character. Then we will make a set of custom teeth that can be reused for additional characters in the future. Lastly we will go over using ZBrush to easily make custom morphs for CC3.
Shape Language
We start with a short conversation about shape language in Character Design. Having an understanding in shape language can help you convey the personality of your character to your public. Character Design is a very powerful field of study, and in the end, will make you a stronger artist.
Proportions
Proportions is the bedrock of sculpting. If it’s not right then your sculpture will not ever be right. CC3 is powerful in that you can quickly use it’s Morph Sliders to adjust the proportions of your character before you ever begin sculpting. We will do this to create the base we will start with in ZBrush.
Start ZBrush Sculpt
This video covers using the Goz Plug-in to export your character from CC3 to ZBrush. Then we cover some basics of ZBrush and start sculpting our toon female.
Testing in CC3
One of the nicest things about the CC3 Pipeline is that you can send your sculpture back and forth between CC3 and ZBrush at any time. You could even adjust the Morph Sliders at any time to tweak your proportions. This allows you to visualize your character while your creating it.
Refining
In this video we continue to refine the sculpture in ZBrush. We are pushing simplification of human anatomy to give it the appearance of a cartoon character.
Exporting Base Color Maps
One of things I enjoy doing is working on the painting of my character while I am still sculpting it. We can take the default CC3 color maps and use them as a base to paint on. This video covers exporting the color maps so we can use them in ZBrush.
Importing Textures into ZBrush
One of the nice things about ZBrush is that at any time you can paint on your sculpture. In this video we take the color maps from the last video and transfer them to our sculpture. Then we can continue to paint on the character when we choose to.
Color Corrections
In the world of PBR ZBrush is often overlooked for painting. But one Huge Advantage that ZBrush has over Substance Painter is that it can paint across UV seams Freely. Once you have this base painted you can then take it to a PBR paint program such as Substance Painter.
Exporting an FBX
In this short video we export an FBX file of what we have so far. We are going to use the FBX in Substance Painter.
Exporting Color Maps
In order to finish our paintjob in Substance Painter we are going to want to export our Color/Diffuse Maps from ZBrush. This video will show you how.
Exporting Normal Maps
Substance Painter uses Normal Maps. They actually affect the look of the materials in Painter. We will generate some Normal Maps in ZBrush to use in Substance Painter in this video.
Substance Painter
In this video we set up our Substance Painter project and import our maps that we created in ZBrush.
Final Paint
Now that we have Substance Painter set up, we complete our paint work. When completed we export PBR Textures for use in CC3. I have supplied an export Preset that you can download to make exporting easy.
Texturing
In this video we Auto-Rig our character and add the new PBR maps we created in Substance Painter.
Morph
In this video we show you how to take your sculptures and create custom Full Body Morph Sliders. This allows you to use the silhouette and proportions at any time by just using the sliders you have created.
Pushing the Toon
In this video I do some final tweaks to make sure the character looks as I intended. Typically I will walk away from a character for at least one day. Then when I go back I can see things with Fresh Eyes and make the final changes that are needed.
3DXchange Corrections
Often when you radically change the shape of the head it can affect the premade morphs in a CC3 character. One area that may need correcting, is the closing of the eyelids. Especially if you have created huge cartoon eyes. Here we look at 3DXchange to do a quick correction.
Toon Teeth
It was decided that to push the Toon look custom teeth were needed. In this video I quickly sculpt some Custom Teeth.
Rigging Custom Teeth
Custom Teeth need to be rigged and weighted to the CC3 Skeleton. This video covers how to do this in Maya.
Custom Eye Morphs
This video covers using ZBrush and 3DXchange to correct morphs when needed.
Head Morph
The video covers how to do a Custom Head Morph and create a slider for it.. This used to be a fairly tedious process, So I decided to invent a new method in ZBrush that is fast and fun to do.
Moving
In this video we import our character into iClone. Then we pose her and do some basic animation.
Motion Clip
In this video we show the basics of adding a Motion Clip to our animation.
lB6MwSwNNIYYHz66UqInBRH/video%204/31662
Direct download links 6.2 GB :

Direct download link reserved for subscribers only This VIP
Dear user to download files, please subscribe to the VIP member
- To activate your special membership site, just go to this link and register and activate your own membership . >>>register and activate<<<
- You can subscribe to this link and take advantage of the many benefits of membership.
- Direct downloads links
- No ads No waiting
- Download without any limitation ، all content in website
CGArchives Is The Best
Review
Review
Review this tutorial