3d modeling3ds maxgame makingMarmoset ToolbagPhotoshopQuixel SuiteSoftware usedtexturingtutorialTutorial content
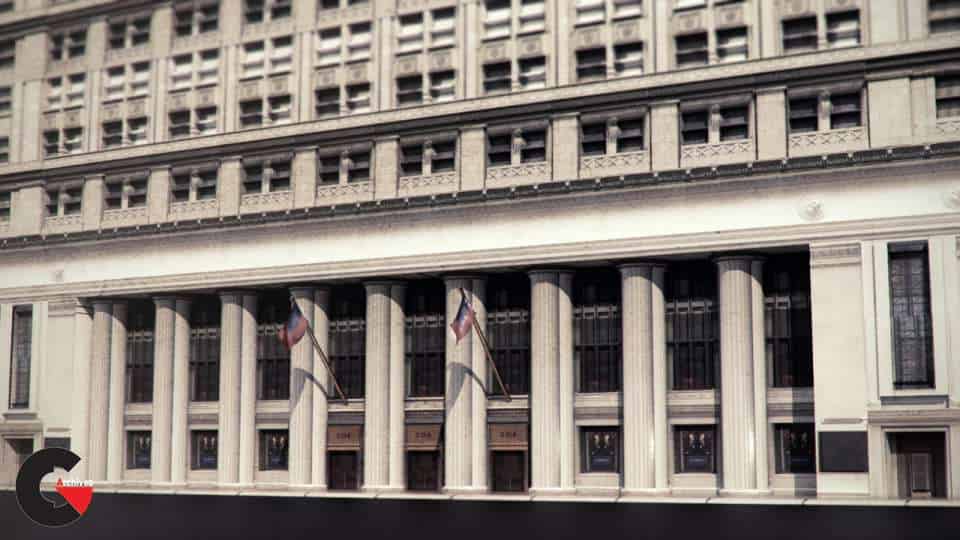
Modeling and Texturing a Next-gen Building for Games
Modeling and Texturing a Next-gen Building
Modeling and Texturing a Next-gen Building : Throughout these lessons we’ll cover the modeling and texturing of a next-gen building in 3ds Max and Quixel. We’ll start by using a reference photo to create a texture sheet and how to use the grid to make the modular pieces. We’ll then go into modeling and making our physically based shaders. Additionally we’ll create the normal maps with Quixel’s NDO. Finally, we’ll light and preview our model and textures in Marmoset Toolbag.
Contents :
- 1 Introduction and Project Overview 01:04
- 2 Setting up the Full Building Reference 08:58
- 3 Determining our Needs for Texture Sheet 09:43
- 4 Setting up our Texture Sheet 08:35
- 5 Working on our Texture Sheet 09:23
- 6 Completing our Texture Sheet 10:13
- 7 Learning the Basics of Normal Map Creation 06:58
- 8 Making our Normal Maps 09:14
- 9 Detailing our Sections 10:35
- 10 Creating a 2D Plane and Detaching our Modular Pieces 08:30
- 11 Setting up a Reference Photo in 3ds Max 10:12
- 12 Creating a 2D Paper Model 09:38
- 13 Using the Snap Tool 09:55
- 14 Creating the Top 3D Building Geometry 09:13
- 15 Creating the Right Side 3D Geometry 12:22
- 16 Modeling the Columns 05:52
- 17 Creating the Middle of the Building 09:48
- 18 Creating the Left Side 3D Geometry 09:58
- 19 Creating the Material ID Mask in Photoshop 11:51
- 20 Previewing the Normals and Material ID in Marmoset Toolbag 09:53
- 21 Importing the Normal Map and the Material ID Map 09:23
- 22 Creating the PBS Textures in Quixel’s DDO 10:53
- 23 Creating all our Materials 11:00
- 24 Setting up our Masks for all Materials 07:49
- 25 Creating the Concrete Texture in DDO 09:39
- 26 Creating the Brass, Copper, and Bronze Textures 11:14
- 27 Creating the Windows Texture 07:24
- 28 Adjusting all the Textures in DDO 06:16
- 29 Importing our Model into Marmoset Toolbag 08:48
- 30 Making more Changes to the Geometry 07:52
- 31 Changes to the Pillar Geometry 09:32
- 32 Creating the Sidewalk Geometry and the Flag Poles 11:37
- 33 Exporting our Building to Preview it in Marmoset Toolbag 08:37
- 34 Tweaking our Textures 07:16
- 35 Creating the Lighting in Marmoset Toolbag 09:33
- 36 Modifying our Textures to Add More Detail 11:32
- 37 Finishing the Lighting and Final Touches for Rendering 13:13
- 38 Adjusting the Diffuse Map for a Different Lighting Setup 12:10
- 39 Making a Rainy Scene and Changing the Lighting 10:21
lB6MwSwNNIYYHz66UqInBRH/video%20g/33348
Direct download links 4.25 GB :
Direct download link reserved for subscribers only This VIP
Dear user to download files, please subscribe to the VIP member
- To activate your special membership site, just go to this link and register and activate your own membership . >>>register and activate<<<
- You can subscribe to this link and take advantage of the many benefits of membership.
- Direct downloads links
- No ads No waiting
- Download without any limitation ، all content in website
CGArchives Is The Best
Review
Review
Review this tutorial
