FXPHD – Intermediate MARI Techniques
 Intermediate MARI Techniques
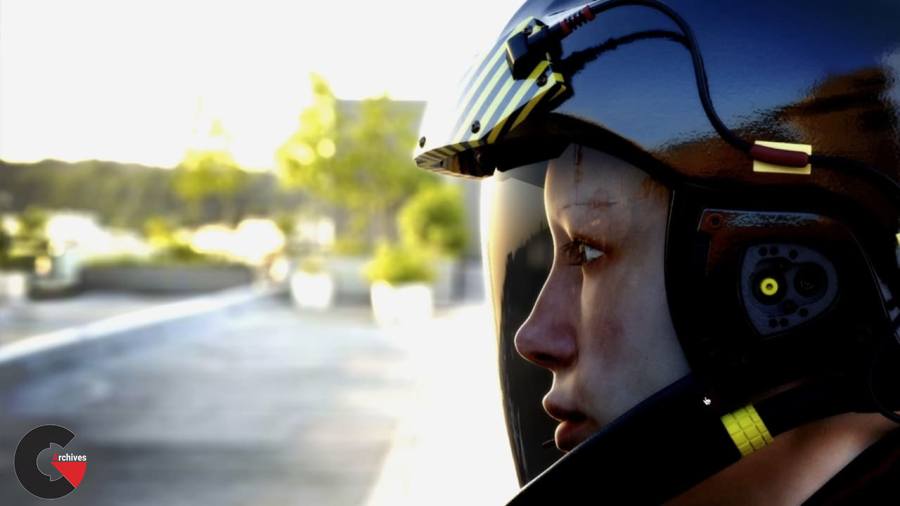
Intermediate MARI Techniques : In this intermediate MARI course, taught by Mikey Rogers, we explore the powerful features introduced in Mari 2.0. We want to emphasize that we are also opening up the course to Mac OS X users as Mari 2.5 now supports Mac OS X 10.8.5 (Mountain Lion) and above! We want to keep things simple but still build on each preceding lesson, so we are going to concentrate on just two hero assets with a few supporting assets. Our end result will be a fully painted human jet pilot placed in an environment to give her a sense of purpose and history.
We start things off by going over the basics of preparation and asset creation as well as explain the benefits of a tiled UV workflow. This will give us a chance to explore the model, think about the types of textures we need and talk about why finding valuable reference is an important part of the texture painting workflow.
The rest of the course will take us step by step on painting each part of the jet pilot from clothes to accessories to skin. Since we want to tell a story with our textures, we spend some time in the later classes painting up a destroyed jet wing as well as a simple floor and background to give the environment a mood and sense of completion.
Finally, we want to make sure you understand how your maps will be used in the next part of the visual effects pipeline. To accomplish this, as we finish each class, we test our maps in the widely used look development plugin VRay. This should leave us with a little bit of time to finish off the course with some basic lighting if desired or instead to allot additional time to finesse our textures. We will leave this up to you.
Mikey Rogers is a Computer Graphics Generalist with a concentration in Texture Painting, Look Development and Lighting. He got his feet wet at Method Studios where he first used Mari in its infancy, testing it before it was released to the public and has pushed for its use at every studio he has since worked at. He has had the pleasure to work for such prestigious studios as Buck, Rhythm & Hues, The Mill, Imaginary Forces, Digital Domain and Pixomondo to name just a few. His portfolio includes work completed on feature films such as Let Me In, Alvin and the Chipmunks: Chipwrecked! and Beautiful Creatures in addition to a bevy of design- and visual effects-related commercials, video game magazines and cinematics for Toyota, Lexus, Cadillac, Comcast, MTV, Sony, Target, Keebler and many more.
course syllabus
CLASS 1
Prep and asset creation. Tiled UV Workflow. We spend this class to talk about the characteristics of the model we are working with, the screen space that it intends to take up and the mood we wish to convey as well as the type of concept art we wish to find that will help speak for our intentions. This all directly correlates to the types of textures that we are going to paint down the line. It is an extremely important step as it drives what we do for the remainder of the course. We also talk about why Mari thrives with tiled UV assets.
CLASS 2
General base layer overview. We start things off by getting a basic base layer on the model. This gives us a chance to talk about Mari’s procedural painting tools as well as why color keys are important for parts of the visual effects pipeline, like animation. We also talk about image import, shader creation in Mari and VRay and map export.
CLASS 3
Jump suit. This is where we start painting our first maps using the paint-through tool and we start talking about how to use filters as well as the new paint and adjustment layers found in Mari 2.0 to tweak our projections after we baked our textures down to maintain a nondestructive workflow. We explain the difference between copying and sharing layers and how masks can be used to affect other channels in our shaders.
CLASS 4
Gloves, shoes and accessories. Here we move onto other parts of the asset where we can explore different types of materials and textures. This will also give us a chance to talk about how to copy baked maps from one UV tile to another, a very efficient workflow in getting detail to the rest of your model in an effortless way.
CLASS 5
Helmet and head. Time to talk skin! Here we work with some face and head projections, create subsurface maps, eye maps and show an alternative way to do eyelashes. We also paint up the helmet with decals and incandescent maps if you want to add lights inside the helmet.
CLASS 6
Finalize pilot. We wrap up our lesson on skin and subsurface and review the helmet while making sure our entire asset is balanced and to our liking. This is super important before we move on to next week where we start adding our base wear and tear and add little things like decals, etc.
CLASS 7
LightBrush. We take a look at the ins and outs of LightBrush which will effectively paint lighting information out of our source photography. It does this by taking in a few inputs from the user and it then separates illumination from reflectance, giving us a flat image that we can directly use in Mari. This shaves hours off the cleanup process and is just amazingly fun to use!
CLASS 8
LightBrush + Jet Wing Continued. We are pushing the use of LightBrush a little further with a real-time demo of how to use the textures we shot in LightBrush and unify (color correct) them for use in Mari. A little more time is spent on blending these maps together on the geometry and we get a preview of how this will work once we get to our grunge lesson next week.
CLASS 9
Grunge. This week we discuss the power of shared layers, particularly when used as masks between channels. We spend a bit of time talking about how to consolidate and cache your completed base layers to speed up Mari as well. This allows us to delve into creating detailed grunge maps for when we want to both eat away at surfaces as well as paint blood and dirt across multiple objects in our scene.
CLASS 10
Final. We wrap things up by making sure you have got a firm understanding on what your grunge maps are doing for you. To do that, we spend a bit more time in Mari to show what you can do with them in the texture painting phase. Then we jump to VRay to create a rendering pass for the grunge maps. Finally, we take things to Nuke where we do a quick composite of all the lighting passes and show you how you can even further change the look of your grunge maps (and character), even in the final stage of the visual effects process.
lB6MwSwNNIYYHz66UqInBRH/video%205/44404
Direct download links 8.7 GB :
Direct download link reserved for subscribers only This VIP
Dear user to download files, please subscribe to the VIP member
- To activate your special membership site, just go to this link and register and activate your own membership . >>>register and activate<<<
- You can subscribe to this link and take advantage of the many benefits of membership.
- Direct downloads links
- No ads No waiting
- Download without any limitation ، all content in website
CGArchives Is The Best
Review
Review
Review this tutorial
 Intermediate MARI Techniques